1. 备案信息
由于国内网站都需要备案,并在网站底部添加备案信息,但是Maupassant主题中没有这方面的配置,所以基于原作者的网站样式,在作者的源码上添加备案信息。
1.1 完成备案
在添加备案信息之前需要完成网站的备案,取得网安备案号和ICP备案号。具体备案方法在每一个服务器提供商处都可代理完成。可按提示完成,大约需要3-7天。
1.2 修改源码
在\maupassant\layout\_partial文件夹下的footer.pug文件中,添加自己的备案信息。代码如下:
1
2
3
4
5
6
7
8
9
10
11
12
13
14
15
16
17
18
19
20
21
22
23
24
25
26
27
28
29
30
31
32
33
34
35
| #footer= 'Copyright © ' + date(Date.now(), 'YYYY') + ' '
a(href=url_for('.'), rel='nofollow')= config.title + ' | '
|
a(rel='nofollow', target='_blank', href='http://beian.miit.gov.cn') 鄂ICP备 19017407号-1
| |
img.nofancybox(src='//qiniu.cdn.foreversfj.com/image/blog/20190728/N0BTF6mJ1Ilb.png!share', style='margin-bottom: -4px;')
a(rel='nofollow', target='_blank', href='http://www.beian.gov.cn') 鄂公网安备 42011102003450号
br
span#timeDate 载入天数...
span#times 载入时分秒...
script.
var now = new Date();
function createtime() {
var grt= new Date("07/09/2018 12:49:00");
now.setTime(now.getTime()+250);
days = (now - grt ) / 1000 / 60 / 60 / 24; dnum = Math.floor(days);
hours = (now - grt ) / 1000 / 60 / 60 - (24 * dnum); hnum = Math.floor(hours);
if(String(hnum).length ==1 ){hnum = "0" + hnum;} minutes = (now - grt ) / 1000 /60 - (24 * 60 * dnum) - (60 * hnum);
mnum = Math.floor(minutes); if(String(mnum).length ==1 ){mnum = "0" + mnum;}
seconds = (now - grt ) / 1000 - (24 * 60 * 60 * dnum) - (60 * 60 * hnum) - (60 * mnum);
snum = Math.round(seconds); if(String(snum).length ==1 ){snum = "0" + snum;}
document.getElementById("timeDate").innerHTML = "运行 "+dnum+" 天 ";
document.getElementById("times").innerHTML = hnum + " 小时 " + mnum + " 分 " + snum + " 秒";
}
setInterval("createtime()",250);
br
div
.github-badge(style='margin-right: 3px;')
a(href='https://hexo.io', target='_black', rel='nofollow')
span.badge-subject Powered by
span.badge-value.bg-blue Hexo
.github-badge
a(href='https://github.com/tufu9441/maupassant-hexo', target='_black', rel='nofollow')
span.badge-subject Theme
span.badge-value.bg-yellowgreen Maupassant
|
由于作者的主题使用了jade语言,如果又看不懂的,可以先自己写好foot的html格式的语言,然后通过在线工具转成jade语言,也就是.pug格式的文件。注意,jade通过制表位和空格代替层级,不能随意删除。而且tab和空格不能同时使用。
另外,在使用的时候发现作者的更新库中style.scss文件缺少一个样式,手动复制补全,如下:
1
2
3
4
5
6
7
8
9
10
11
12
13
14
15
16
17
18
19
20
21
22
23
24
25
26
27
28
29
30
31
32
33
34
35
36
37
38
39
40
41
42
43
44
45
46
47
48
49
50
| .github-badge {
display: inline-block;
border-radius: 4px;
text-shadow: none;
font-size: 12px;
color: #fff;
line-height: 1.25;
background-color: #ABBAC3;
margin-bottom: 5px; }
.github-badge a {
color: #fff; }
.github-badge img {
height: 1.25em;
vertical-align: top; }
.github-badge .badge-subject {
display: inline-block;
background-color: #555;
padding: 4px 4px 4px 6px;
border-top-left-radius: 4px;
border-bottom-left-radius: 4px; }
.github-badge .badge-value {
display: inline-block;
padding: 4px 6px 4px 4px;
border-top-right-radius: 4px;
border-bottom-right-radius: 4px; }
.github-badge .bg-brightgreen {
background-color: #4c1 !important; }
.github-badge .bg-green {
background-color: #97ca00 !important; }
.github-badge .bg-yellowgreen {
background-color: #a4a61d !important; }
.github-badge .bg-orange {
background-color: #FE7D37 !important; }
.github-badge .bg-yellow {
background-color: #dfb317 !important; }
.github-badge .bg-blueviolet {
background-color: #8A2BE2 !important; }
.github-badge .bg-pink {
background-color: #FFC0CB !important; }
.github-badge .bg-red {
background-color: #e05d44 !important; }
.github-badge .bg-blue {
background-color: #007EC6 !important; }
.github-badge .bg-grey,
.github-badge .bg-gray {
background-color: #555 !important; }
.github-badge .bg-lightgrey,
.github-badge .bg-lightgray {
background-color: #9f9f9f !important; }
|
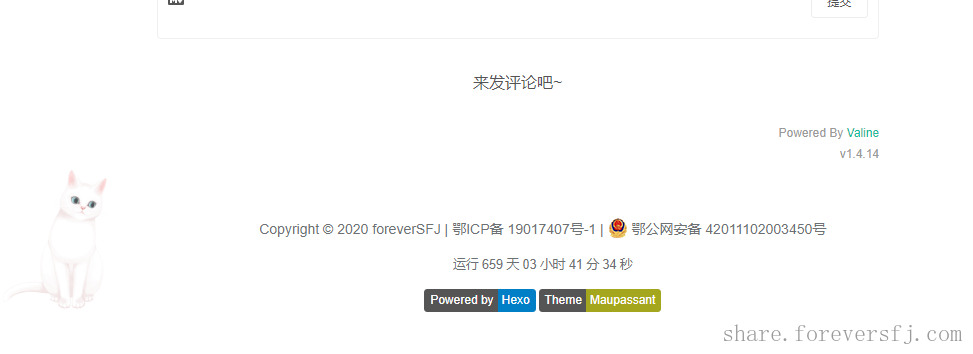
经过修改之后,网站的地步就会有自己的备案信息了!
2. 添加live2D效果
使用live2d可以使自己的网站更可爱一下,有的model还有对话效果,很不错。
2.1 步骤
2.1.1 安装live2d
先检查博客主目录下面的 package.json里是否有"hexo-helper-live2d": "^3.0.3",依赖,有的话可以先卸载。 使用命令:npm uninstall hexo-helper-live2d。
之后再安装:npm install --save hexo-helper-live2d
注意:命令都是在你的hexo博客的根目录下执行
在安装完成之后,再去 node_moduels目录下,可以看到有如下文件夹,这些都是动画主配置

2.1.2 安装模型
live2d有很多模型,名称可以到这里参考,一些模型的预览可以在这里,使用npm安装。
1
| npm install live2d-widget-model-shizuku
|
常用模型名称:
1
2
3
4
5
6
7
8
9
10
11
12
13
14
15
16
17
18
19
20
21
22
| live2d-widget-model-chitose
live2d-widget-model-epsilon2_1
live2d-widget-model-gf
live2d-widget-model-haru/01 (use npm install --save live2d-widget-model-haru)
live2d-widget-model-haru/02 (use npm install --save live2d-widget-model-haru)
live2d-widget-model-haruto
live2d-widget-model-hibiki
live2d-widget-model-hijiki
live2d-widget-model-izumi
live2d-widget-model-koharu
live2d-widget-model-miku
live2d-widget-model-ni-j
live2d-widget-model-nico
live2d-widget-model-nietzsche
live2d-widget-model-nipsilon
live2d-widget-model-nito
live2d-widget-model-shizuku
live2d-widget-model-tororo
live2d-widget-model-tsumiki
live2d-widget-model-unitychan
live2d-widget-model-wanko
live2d-widget-model-z16
|
2.1.3 使用
安装好live2d及其模型之后,在hexo的配置文件_config.yml中添加如下配置:
1
2
3
4
5
6
7
8
9
10
11
| live2d:
enable: true
scriptFrom: local
model:
use: live2d-widget-model-tororo
display:
position: left
width: 150
height: 300
mobile:
show: true
|
之后,就可以启动hexo查看效果了:
3. SEO优化
3.1 添加百度sitemap
3.1.1 生成 sitemap 文件
需要先安装两个 hexo 插件:
1
2
| npm install hexo-generator-sitemap --save-dev
npm install hexo-generator-baidu-sitemap --save-dev
|
一个是传统的 sitemap,一个是百度专有的 sitemap。多多益善。
安装完这两个插件,再重启 hexo,在本地访问 http://127.0.0.4000/sitemap.xml 和 http://127.0.0.4000/baidusitemap.xml 就能正确的展示出两个sitemap 文件了。
3.1.2 注册百度站长平台
直接根据提示注册即可
3.1.3 添加个人网站
进入站点管理添加需要管理的网站地址,第二步的验证有三种方式:文件、html标签、cname。因为个人使用的是 coding 的pages服务,域名是属于系统分配的,所以无法使用cname验证来完成,当然如果这是你的个人域名,这个方案也是挺容易的。
其次我尝试使用文件的方式来实现,但是不幸的是,失败了。经过调查发现是因为 hexo 在生成文章的时候会把所有的.html 文件处理一遍,加上一些额外的东西,结果就是导致了 百度站点验证的文件里面多了很多其他东西,所以就无法验证通过。
所以最终的方案就是添加 html 标签了。添加完相应的标签之后,上传到自己的博客之中,多刷新几次,百度站点那边就会通过了。
3.1.4 提交 sitemap 文件
转到链接提交处,选择自己的站点网址。找到自动提交,选择sitemap。按照提示的格式添加自己的sitemap文件
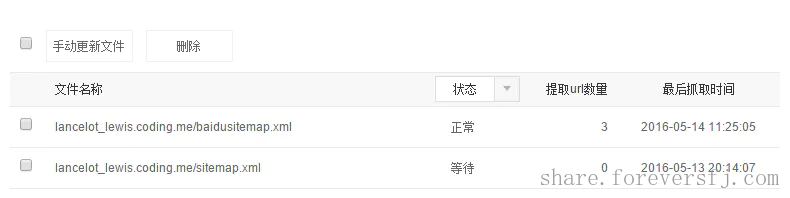
接下来要做的就是等待了,过上一两天就会在这里看到提取的 url 数量了
3.2 Google
本文标题:Maupassant主题优化
文章作者:foreverSFJ
发布时间:2020-04-28 16:18:11
最后更新:2020-04-28 16:18:11
原始链接:Tools/Hexo/Maupassant主题优化.html
版权声明:本博客所有文章除特别声明外,均采用 CC BY-NC-ND 4.0 许可协议。转载请注明出处!
